The first thing we did was to import all our footage into Adobe Premiere Pro. We layered our desired takes into the timeline on alternating tracks. This was done so that we could easily layer newer footage on a higher track then the old. Subsequently, we could revert back to an older version of a shot if we felt an edit didn't look right.
 |
| Composition of layers in the Mars scene. |
The majority of the time spent editing was done so using Adobe After Effects. The first thing we had to do for the majority of shots was to chroma key the green screen out. Although seemingly a quick process, it did take me a while of subtle tweaking in order to remove things such as green tint in some of the actors' hair. Furthermore, I had to do some manual masking to remove things that chroma-keying could not. For example, where we had secured the green screen with sticky tape it shone brightly, this I had to mask out manually.
 |
| I fiddled with the threshold a lot in order to have it brighten all the sticks, but not the background. |
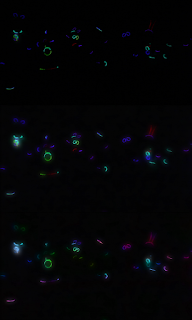
Something which we hadn't planned on doing beforehand but I experimented with at the time was increasing the brightness and vibrance of the glow-in-the-dark shots. To do this I added the 'glow' effect to the shots, alongside a 4-way colour corrector. This made the glow sticks appear multicoloured. Feedback from classmates suggested that this made the footage look far more impressive than it did beforehand.
 |
| From top to bottom: Original footage Footage with glow added Footage with noise added. |
 |
| I used fractal noise on an adjustment layer in order to vary the colour of the glow sticks. |
To make the glow-in-the-dark scenes more interesting, I decided to try to make the individual glow sticks multicoloured. In order to achieve this, I created an adjustment layer and added fractal noise. I then varied the settings until it gave the kind of effect I wanted.
The upshot of this was that it basically acted like a colour filter that was a splatter of various different colours.
Another effect I did was at the beginning of the Mars scene, the first step that Shay takes, there is an ECU shot of her foot hitting the ground. I decided to add dust to this. I used a clip of a dusty impact, and coloured it the same colour as the Mars scene. I also added a sandy 'ground' by getting a rocky sand texture, recolouring it, and stretching it into the Z axis, giving the illusion of depth.
 |
| I masked the dust so it would appear in front of the foot. |
 |
| The same shot, but with the mask enabled, showing the dust only appearing above the base of the foot. |
Another effect that I did was to add the 'paint' under Shayam's finger as she wrote on the walls....
Unfortunately the post-production process took far longer than I would've hoped due to the After Effects projects taking a long time to open, and crashes occurred frequently.
 |
| One of the longest opening times for one of the AE Project files. |
No comments:
Post a Comment